

Telegram has become one of the most important messaging programs in the world today. Free and open-source instant messaging software offers many useful features that make it suitable for implementing complex robots. Since its inception, there have been several ways to develop robots for Telegram. With the new Voiceflow Dialog Manager API, the call design platform is the best choice for designing, developing, and integrating a Telegram chatbot.
Here are the things you need to do to create a Telegram robot using Voiceflow:
1. Telegram account
2. Voiceflow account
3. Visual Studio code
In this example, we are going to use the Telegraf library for NodeJS projects to interact with our Telegram robot. As mentioned above, any user interaction in the Telegram robot will be sent to Voiceflow using the Dialog Manager API.
First, we have to use Botfather to create our own robot inside Telegram. BotFather lets you create new robot accounts and manage existing accounts with a few simple clicks. To start the process of creating a robot, you just need to talk to BotFather and follow the steps below.
Click the “start” button to open a chat with BotFather.
Click on the new bot command to create a new robot. In the next step, you can name your robot. In this example, I named it “bot Voiceflow”.
The launch of Telegram was completed easily! Remember to add your Telegram token to your .env file in the TELEGRAM_TOKEN. attribute.
Install and run the project:
git clone
yarn install
yarn start
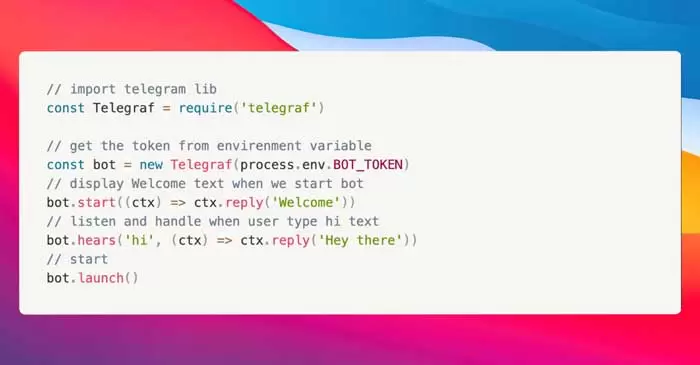
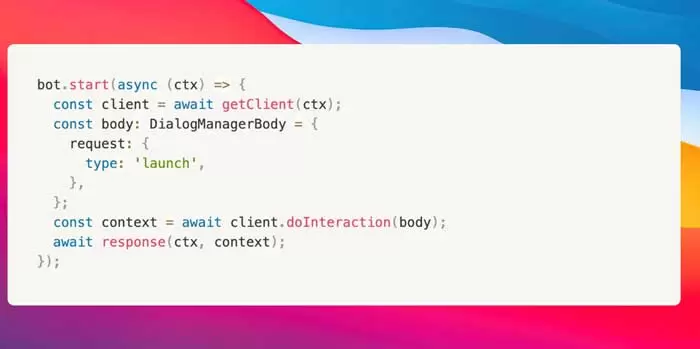
We can create a robot with the following code:
Note: It is important to note that you must create a General Project in Voiceflow to implement the robot.
Now let’s implement the Voiceflow client to work with the Voiceflow cloud using the Dialog Manager API.
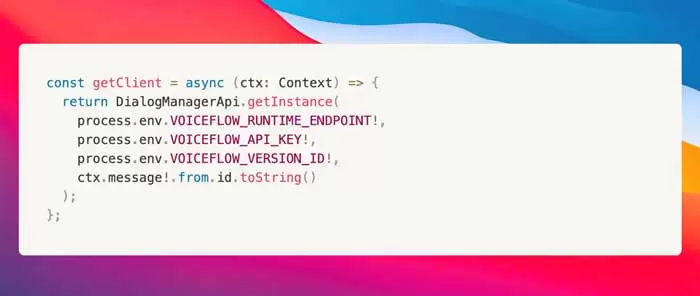
The getclient () function calls DialogManagerApi.getInstance as the REST API client to interact directly with the Dialog Manager API.
As you can see, there are values that are added to the .env file. Let’s explain how to get those variables.
To get your VersionID you need to go to the Voiceflow Project:
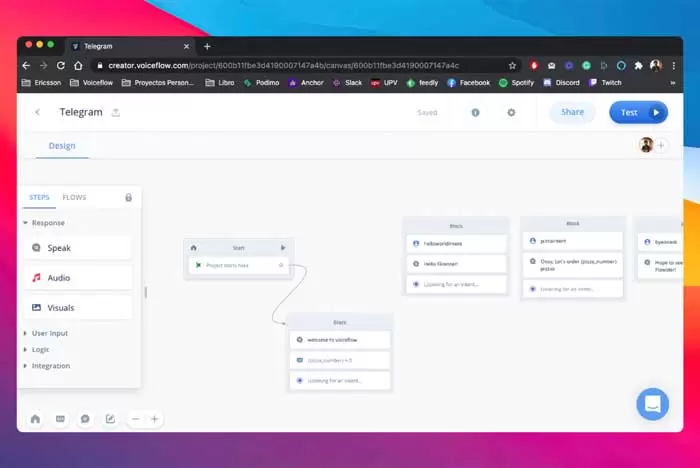
Then copy VOICEFLOW_VERSION_ID from the URL in your address bar. When you are in the Voiceflow project, your address bar should have the form URL:
https://creator.voiceflow.com/project/ {VOICEFLOW_VERSION_ID}/…
To get the Key API you have to go to the workspace where you created your General Project. After that, go to the workspace settings and click on the developer tab.
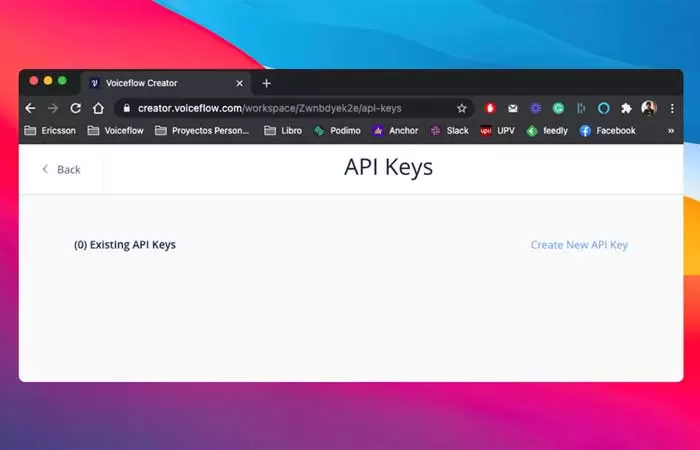
Then you have to click the Create New API Key button to create a new key:
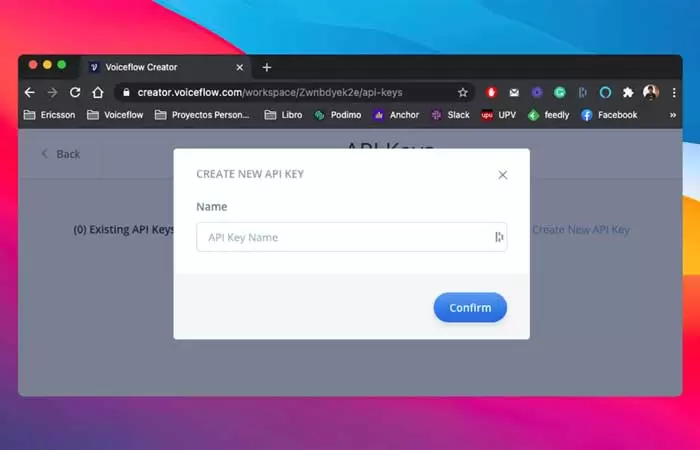
There you have to choose a name for the new Key API, for example, telegram-bot. After selecting the name, click the Confirm button:
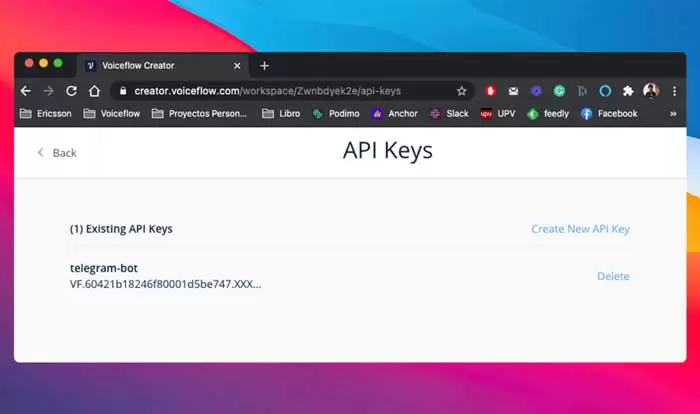
Finally, we need to add these variables to our final .env file. As shown below:

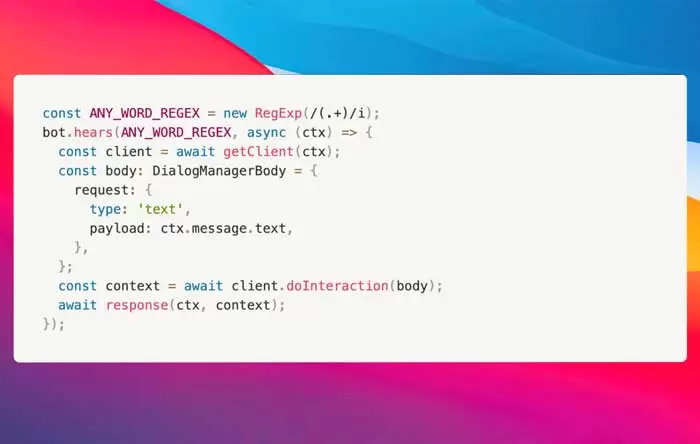
everything is ready. Let’s continue with the Telegram robot code. Replace start with the following code and get the answer from Voiceflow:
Then replace hi for regex with (+.). This means that the robot hears everything. All incoming text is transmitted directly to Voiceflow and we manage the status of the conversation: If it’s finished or not finished yet:
The response method is responsible for sending the user input in Telegram to Voiceflow using the runtime SDK client. This method allows you to process the answer:
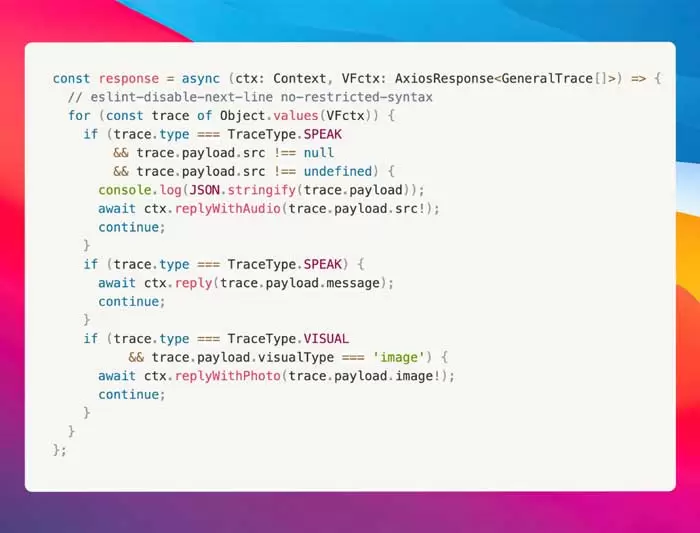
In the example above you will see different types of answers including SPEAK, VISUAL and AUDIO.
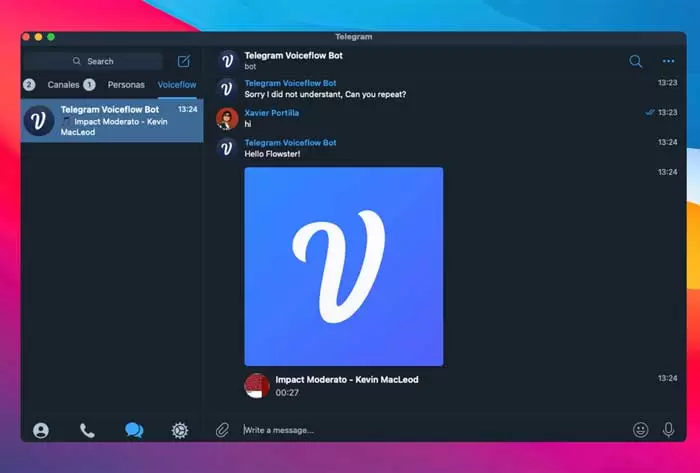
As you can see, with just 60 lines of code, you can quickly bring your chat experiences to life. We hope this gives you a better understanding of how to use Voiceflow to bring conversational experiences to your interfaces and products.

No Comments